
Finding out your TV screen is cracked or the frame is bent right after delivery is frustrating. After all, you’ve been waiting for it, planning the setup, and possibly even rearranging your space to welcome it. Whether you’re upgrading your home entertainment area or finally replacing an aging model, damage right out of the box can be a major letdown. It’s tempting to shove the box back in the corner and deal with it later, but the sooner you act, the better the outcome will be.
TVs aren’t cheap, and handling a damaged one during or after in-home TV delivery can take some quick thinking. If you live in the Bay Area and your new screen doesn’t arrive in perfect condition, it’s important to follow a few key steps to protect your investment. Being prepared with the right steps can help you get things resolved faster and make sure you’re not left stuck with a broken device.
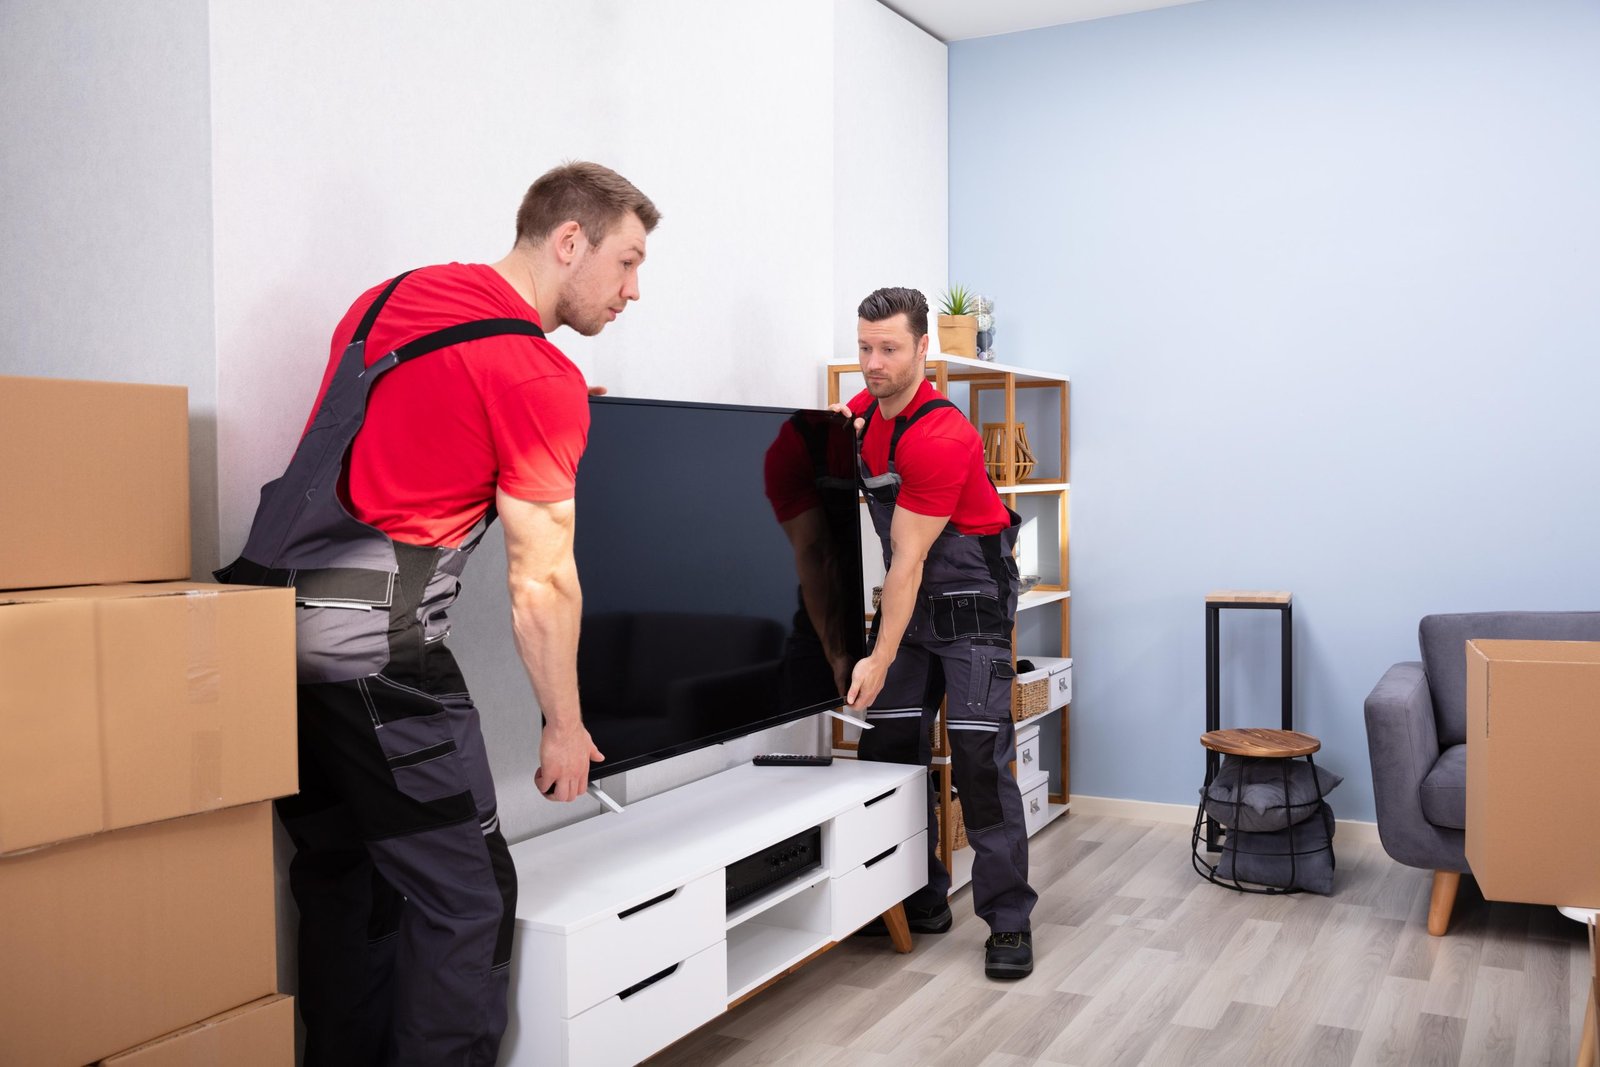
The moment your delivery arrives, stop and take a close look at everything before tearing into the packaging. Most people get excited to unbox a new TV and jump straight into setting it up, but this is the time to slow down and be thorough. Once the TV is out of the box and installed, reporting damage becomes a whole lot harder.
Here’s what to do right away:
– Check the outer box for dents, tears, wet spots, or crushed edges. These can be signs of rough handling.
– Once you open the box, carefully inspect the screen for cracks, scratches, or warping.
– Look over the frame and edges of the TV. If something looks bent or feels loose, make a note.
– Inspect the stand or legs if those are included. Even small cracks or misalignment can turn into bigger issues later.
– Document everything. Take clear photos from different angles and write down today’s date along with notes about where and how the damage appeared.
If possible, keep all packaging. This might be required for a return or damage claim, and it helps avoid delays. Don’t plug in or mount the TV before filing a report about the condition. Even if it powers on, visible damage can still affect function and long-term use.
Once you’ve taken photos and made notes, your next step is to report the damage directly to the delivery service. Don’t wait too long. Many carriers have short reporting windows, and waiting even a day can make it harder to get help.
Here’s how to go about it:
1. Look up your delivery confirmation email or the receipt that includes tracking info.
2. Find the customer service number or online claim portal for the delivery company.
3. Share all the info they’ll need:
– Order number
– Tracking number
– Exact delivery date and time
– Description of the damage
– Attached photos from different angles
Always ask for a claim number or some type of reference ID so you can follow up easier. It’s also smart to save any emails, messages, or notes from phone calls in a folder for easy reference.
Try to stay calm when speaking with the rep. Mistakes happen during shipping, and most companies will work with you to figure out the next step. Once the claim is logged, they may direct you to whoever sold you the TV, but documenting your contact with the delivery service can help prove that the damage likely happened during transport.
Once you’ve made contact with the delivery service, the next step is to get in touch with the retailer where you purchased the TV. In some cases, the delivery company and the store might be connected, but it’s best not to assume. Reach out to the retailer directly, even if the delivery company has already been notified. This gives you a better chance of getting a refund, replacement, or solution without dragging out the process.
Before calling or sending an email, gather your materials. You’ll want to have the following ready:
– Your order confirmation or receipt
– Delivery and claim details
– Clear photos showing the damage
– Notes from your conversations with the delivery company
When you contact the retailer, let them know the TV arrived damaged and that you’ve already reported it to the delivery service. Be clear about the situation, and don’t forget to ask about their return or exchange policy. Sometimes stores need the item returned with all original packaging. Other times, they might process a replacement right away. Make sure you understand what they expect, and ask them to confirm it in writing through email if you’re talking by phone.
Don’t be afraid to follow up if things go quiet. Just like with delivery claims, it’s helpful to keep all communications saved and organized in one spot. If possible, choose a contact method, such as email, that gives you a written record of every exchange.
Getting a TV delivered safely should feel easy, but problems happen. Here’s how to stay on the safe side the next time you’re expecting a delivery at home.
1. Be present during delivery.
– If someone’s home, you can inspect the package before the driver’s gone. It’s easier to reject a damaged item on the spot.
2. Give clear notes when placing the order.
– Tell the company where to leave the box and how to reach you. Make sure the path is safe and easy for the delivery team.
3. Choose services that offer in-home delivery and unboxing.
– Some companies offer room-of-choice delivery and even handle initial setup. This lowers the chances of you starting with a broken unit.
4. Look out for red flags in the packaging.
– Even if the box looks fine, always open and inspect everything right away.
5. Ask for written copies of warranties or protection plans, if offered.
– These may come in handy down the line, especially for large electronics.
People often assume a factory-sealed box means everything inside is fine. But packaging can absorb hits during shipping that only show once you take the item out. For example, one Bay Area resident got their TV delivered in the middle of a summer heatwave. The box looked okay outside, but once opened, the screen showed spiderweb cracks that weren’t visible until the glare hit it just right. That’s why it matters to open and check items under good lighting, right away.
Dealing with a damaged TV takes time and patience, but taking action early can really make a difference. By inspecting your unit upon delivery, documenting the damage, and reaching out to the right people quickly, you’re much more likely to get things resolved without frustration. Things move faster when you’ve got your photos, notes, and receipts ready to go, and when you keep records along the way.
It also helps to think ahead before your next big purchase. Some delivery problems can be avoided by being present, setting clear expectations, and choosing help from professionals who know how to handle electronics with care. When done right, in-home TV delivery doesn’t have to be stressful. You can enjoy your setup knowing it was taken care of from start to finish.
If you’re looking to make sure everything goes right with your next TV setup, Bay Area Wall Mounts is here to help. Learn how our in-home TV delivery service can simplify the process and give you peace of mind from delivery to installation.
TV deliveries to commercial spaces aren’t as simple as dropping off a box at the front door. With big screens, tight schedules, and busy staff, the margin for error is small. Whether you’re managing a retail store, office, or restaurant, one damaged screen can mean a delay in setup, loss of time, and more stress than needed. Preventing that kind of damage comes down to one thing: preparation.
Making sure your delivery goes smoothly starts long before the truck shows up. Coordinating your team, clearing a safe path, and knowing what to expect from the delivery crew will save you and your business a ton of hassle. Let’s walk through the best ways to prepare, protect your equipment, and make sure everything lands right where it should, intact and ready to go.
Once your business orders a TV for delivery, the clock starts ticking. Delivery day can turn chaotic fast without a solid plan. That’s why the first thing to square away is the delivery schedule itself. Avoid peak hours or times when the space is busy. Early morning or late afternoon often works best since foot traffic is lower and fewer people are around to accidentally get in the way.
Here are a few quick tips to set yourself up for success:
– Talk to your delivery company about time windows, expected crew size, and what they’ll need from your end
– Pick a delivery time when the fewest number of staff or guests are present to help reduce interruptions
– Clear all doorways, hallways, and setup areas before the truck arrives. Sharp corners, loose rugs, or random boxes can cause stumbles or damage
– If your business has loading docks or elevators, make sure access is approved and working
– Assign a point-person on your team to be available when the delivery happens. This person can answer questions and make quick decisions without holding things up
If you’re managing a space like a hotel or venue, think about seasonal activity. Since this article goes live in mid-July, summer travel likely means higher business traffic. That could make earlier scheduling or late afternoon drop-off times smarter choices.
Investing even fifteen minutes to double-check access points, map out routes, and let your team know when and where delivery will happen makes all the difference between a smooth arrival and a stressful mess.
The flat screens getting delivered to your business might look sturdy packed in foam, but one wrong bump can quickly damage internal parts. That’s why handling matters every step of the way. Whether it’s coming off the truck, rolling down a hallway, or being lifted onto a stand, care is key.
First, always make sure the crew moving the equipment is trained and using the right tools. That means dollies with straps, furniture blankets, and corner protectors. It’s not just about protecting the package, but also avoiding scrapes, dents, or worse on your walls and floors.
One example comes from a downtown Bay Area café we worked with. Their delivery team skipped padding, and the TV brushed up against a tile wall. No cracks, but a noticeable scratch remained. Doesn’t matter how small the damage is. Once it’s there, your guests will notice.
Encourage the use of these best practices whenever commercial TVs are delivered:
– Use team lifts for larger screens. One person shouldn’t be carrying anything that wide alone
– Pre-measure door frames and tight areas so there’s no need to twist or push through narrow passages
– Cover sharp edges or fragile parts like screen corners during transport inside the building
– Don’t set boxes upright unless clearly marked safe to do so
Letting professionals take the lead, while ensuring your space is ready and clear, keeps things moving safely. A little extra caution during these steps goes a long way in protecting your investment.
Once you’ve prepped the space and cleared the path, focus shifts to the people actually carrying out the delivery. Clear communication with your delivery crew can make or break a smooth commercial TV drop-off. The crew needs to know where to go, what to avoid, and how your building is set up. Without the right details, even the most well-planned delivery can hit snags.
Start by sharing building info ahead of time. That might seem minor, but things like elevator access, stairwell width, and ceiling height all play a part. Include instructions about parking zones or loading dock hours. If your property has limited access points or needs security clearance, don’t leave that out. And on delivery day, your point-person onsite should be ready to greet the drivers and point them in the right direction.
Here’s what to make sure your delivery team knows:
– Exact drop-off location inside the building
– Access policies, whether that’s a keycard or front desk check-in
– Hours of operation or quiet times when setup noise needs to be low
– Equipment limitations, like areas where carts won’t fit or elevators that can’t hold large loads
– Contact info for a manager in case something changes during the drop
We had a client who forgot to mention construction in the rear stairwell of their space. The delivery team showed up with their usual route blocked. It added twenty minutes to the drop-off while they figured out a new course. It didn’t ruin the day but it rattled the timeline.
Keep everyone on the same page from beginning to end. When there’s one single contact person who handles all delivery communication, fewer mistakes happen and problems get solved faster.
Once the box hits the floor, your job isn’t done yet. The last few steps are about double-checking that nothing went wrong between the truck and the room. You don’t want to discover a cracked screen or disconnected buttons after the team is gone and you’re already scheduling your next event or opening the doors.
Inspect the outside of the box first before opening anything. Look for dents, holes, or signs it was dropped. If anything seems off, flag it right away and take pictures. Then, carefully unbox the TV in a clean, quiet area. Don’t let anyone rush the process just to get things moving. A slow and steady unpacking helps avoid last-minute scratches or screen pressure that could ruin the unit.
Once it’s unboxed:
– Check for missing cables, legs, or mounting parts
– Scan all corners and edges for chips, marks, or surface cracks
– Test the power button before mounting to be sure it turns on
– If the TV design includes a stand, make sure it sits steady on a flat surface
– Avoid plugging it into outlets near entry doors or kitchen equipment to protect from power surges
Setup should always be handled by someone who understands how mounting works. If the screen gets hung crooked or placed too close to a heat source like an HVAC vent, it’ll create problems later. Don’t let anyone guess. Get a professional involved who knows how to measure and drill safely.
Especially in the Bay Area, where commercial properties vary wildly in structure and layout, this part needs a trained eye. Even one misplaced drill hole in the wrong kind of drywall can turn into a repair job. Schedule the setup ahead of time and coordinate it with the delivery to keep everything aligned.
A smooth commercial TV delivery doesn’t happen by luck. It takes a mix of smart planning, good communication, and real attention to detail. Every step, from confirming truck access to unboxing a flawless screen, matters more than most managers realize until it’s too late.
Taking control of the process from start to finish helps protect both your space and your gear. You’re not just getting a screen delivered. You’re setting up a centerpiece for your customers or employees. Whether it’s showing the game in a sports bar or running presentations in a boardroom, how that screen gets there impacts how soon it can be used and how long it will last.
Working with people who do this sort of thing day in and day out also helps take the pressure off your shoulders. Set your team and your space up for success by paying attention to the details. Your future self and your TV will thank you.
A smooth commercial TV delivery starts with planning and ends with professional setup. Bay Area Wall Mounts is here to help you handle every step, keeping your equipment safe and your business running without delays. Let us take the stress off your plate so your screens arrive ready to use and in perfect condition.
Getting a new TV delivered can feel like a satisfying finish line after days or weeks of planning. You’ve picked out the model, set everything up for installation, and cleared your schedule. But what happens when that same-day delivery hits a snag? Scheduling conflicts can throw a wrench into even the best-laid plans, leaving you frustrated and unsure of what to do next.
In a busy area like the Bay Area, traffic, missed calls, or delayed communication can all lead to last-minute delivery issues. These hiccups don’t have to derail your whole day or delay your setup. Knowing how to handle scheduling issues quickly and calmly can save you a lot of stress. Whether you’re dealing with your first delivery or you’ve been through it before, a little flexibility and preparation go a long way.
You expect your TV to arrive on time, but life doesn’t always work that way. Deliveries can go off track for a number of reasons. Some might be out of your hands, while others are just minor missteps that can be addressed ahead of time.
Here are a few typical reasons that same-day TV deliveries hit scheduling bumps:
– Unexpected delays on the delivery end. Traffic, tight routes, or a previous delivery running over time can push your drop-off out of the expected window. In areas with dense neighborhoods and heavy congestion like the Bay Area, it doesn’t take much for schedules to shift fast.
– Miscommunication between you and the delivery team. If there’s any confusion about what time you’re available or what your building setup includes such as parking, entry codes, or elevator access, that can delay or even cause a missed delivery.
– Last-minute changes in your own plans. Life throws curveballs. Maybe you get pulled into a work meeting or your child’s soccer practice runs long. If you’re not there to receive the TV, the whole process needs to be reworked.
One common example is someone scheduling a delivery for early afternoon, thinking they’ll be home, only to get stuck at an unexpected appointment. Meanwhile, the delivery team attempts to call or knock, but no one answers. That time slot is lost, and now there’s a potential days-long delay in trying again.
Knowing what you’re up against and identifying where issues tend to happen will help you prepare better next time.
Clear communication can make or break how smoothly your same-day delivery goes. It may sound simple, but even one missed call or misunderstood note on your delivery address can cause hours of delay.
Here are a few ways to keep communication strong:
1. Double-check all contact information before confirming your order. Make sure your phone number is current and your voicemail is set up.
2. Add detailed delivery notes. Mention apartment numbers, gate codes, restricted parking areas, or anything else that the crew should be aware of.
3. Stay reachable during the expected delivery window. If a driver tries to get in touch and can’t get through, they may have to move to the next job.
4. Send a quick confirmation text or call to the service earlier in the day to double-check the estimated time of arrival.
5. Keep a backup contact, someone like a partner, roommate, or neighbor, available in case you get tied up at the last minute.
Planning ahead doesn’t guarantee zero delays, but it gives everyone involved a better chance of keeping things on schedule. That bit of coordination up front can save you time and stress after.
Even with the best preparation, things can still go off track. Maybe the delivery window slipped or your schedule suddenly changed. Whatever the cause, there’s usually room to adjust without turning the whole day upside down.
Here are some flexible workarounds if same-day delivery in the Bay Area doesn’t go as planned:
1. Ask about rescheduling options. Many services allow a quick reschedule without penalty if you reach out early or explain the situation clearly. Don’t wait until it’s too late in the day.
2. Arrange for someone you trust to receive the TV. A spouse or neighbor who’s available during your scheduled window can save the day. Just make sure they know what to expect and how to reach you.
3. Build in buffer time. If you know your schedule is tight, try setting the delivery a couple of hours earlier than your next commitment. That layer of cushion time can help a lot.
4. Use real-time tracking if available. Some delivery teams offer status updates or driver tracking links via text or email. These can help you manage your time better and avoid long waiting periods.
Being open to these small adjustments reduces stress and keeps your day moving, even if the delivery doesn’t go exactly as planned.
A professional team familiar with same-day TV delivery in the Bay Area brings a level of preparation that’s hard to match. They understand the local layout and common problems that cause hiccups, and they come ready with tools and know-how.
Benefits of choosing experienced delivery professionals include:
– TVs are fragile and need to be handled with care. Trained teams know how to position and carry them without damage.
– If installation is part of the service, these crews bring everything needed. There’s no guessing about which bolts or tools are required.
– Bay Area logistics can be tough. Tight parking and building access challenges are easier for experienced teams to handle quickly and safely.
– Professional delivery services do a better job keeping you informed. You often get real-time updates, clear estimated windows, and a responsive support contact if anything changes.
When you hire a team that knows what they’re doing, you can focus on enjoying your new setup instead of managing every detail yourself. Their process is smoother, their timing more reliable, and your peace of mind far greater.
After going through a bumpy delivery, most people work harder to avoid the same issues next time. A handful of small steps early on can mean everything runs smoother when the next TV shows up.
Start by confirming every piece of information before the day arrives. That means your phone is working, your address is clear, and any building access details are noted. Charge your phone, and keep it close during the delivery window. Loop in a second person just in case something unexpected happens.
If the TV will be installed too, take time to look at your room layout and where the mount will go. Make sure nearby outlets are free to use, and have any accessories or mounts handy and ready.
No one expects every delivery to be perfect. Managing how you handle curveballs is just as important as setting up the original plan. With solid communication, a flexible attitude, and a delivery crew that’s been through it all before, you can shift things around without much stress.
The more you plan, the easier future deliveries become. And once things fall into place, you can sit down and enjoy your TV exactly where it’s meant to be.
When it comes to handling same-day TV delivery in the Bay Area, a smooth experience is key. At Bay Area Wall Mounts, we understand the hectic nature of your schedule and the importance of getting your setup right the first time. To make the process simple from start to finish, take a look at how our team gets your entertainment center ready without unnecessary delays or stress.

Mounting a TV on a wall made of brick might sound simple at first, until you realize it’s not quite like working with drywall. Brick is strong and durable, but it brings its own set of issues when you’re trying to install a mount securely. You can’t just drill anywhere, and skipping the prep work can lead to mistakes like cracked bricks, loose mounts, or an off-center setup.
If you live in the Bay Area and you’re thinking of upgrading your living room setup, working with a brick wall can feel tricky. But the good news is that with the right steps and proper support, the process is completely manageable. Knowing what kind of brick you’re working with, using the right tools, and planning ahead will make a big difference in how everything turns out.
Before anything gets mounted, it’s important to size up the wall itself. Not all brick walls are created equal. Some are old and crumbly while others are newly built and solid. Taking the time to understand what you’re dealing with can save you from a bad fit or a loose installation later on.
Start by looking at the type of brick. If the bricks are soft, hollow, or show signs of crumbling, they may not be a good anchor point. In that case, it’s better to drill into the mortar joints between the bricks, but only if the mortar is in good shape. If both the mortar and bricks are showing wear, that could mean it’s better to use alternative mounting methods or consult a professional to avoid damaging the structure.
Next, check the wall for stability. A quick tap test using your knuckles can give you an idea of how dense and solid each area is. If the wall sounds hollow or echoey in certain spots, that might not be the best place to secure heavy mounts. Consider these points when assessing your wall:
Weight is another key factor. A standard flat-screen TV can weigh anywhere from 30 to 80 pounds, and that doesn’t even include the mount. Your wall has to comfortably carry that load without risking structural damage. If there are any doubts, always lean toward a cautious route. A secure, well-thought-out placement performs better and adds peace of mind once the TV is up and running.
Installing a TV on a brick wall calls for gear that can handle more pressure than standard drywall setups. Regular screws or plastic anchors don’t do well against brick’s density. You’ll need heavy-duty anchors, sleeve bolts, and a drill with a masonry bit. Skipping these steps or using the wrong tools can make the mount unstable, especially over time.
The type of mount you choose matters, too. Not every bracket is made for brick. If you’re going with a full-motion mount that lets you pull the TV away from the wall and move it around, it’s going to need stronger support than a low-profile mount. Wall type and TV weight should both factor into your decision. For brick, a fixed or tilting mount usually works best because it puts less strain on the hardware and keeps things more stable.
Before you begin drilling, prep the wall. Use a level to mark your holes. Make sure every mark lines up with the mounting bracket holes. This will help avoid a slanted TV setup, which is surprisingly common when working with uneven brickwork. You should also:
It’s smart to double-check packaging labels on mounting hardware. Many kits include fasteners for wood or drywall but not for brick. Matching the hardware to the job gives everything a better chance of holding up long-term, especially with Bay Area weather causing natural shifts to older homes.
Once you have the right equipment ready and your brick wall checked, you can move into setting things up. Though every layout is different, a general process applies to most installs.
Installing a mount on a brick surface takes more patience, but you’ll feel the difference when the TV hangs tight with no shifting or swaying.
Mounting to brick ups the difficulty of the job. That’s why many people in the Bay Area prefer to hand it off to a professional from the start. One bad drill could ruin a part of your wall or make it unsafe for a screen. A pro brings the right tools, wall knowledge, and experience to avoid that outcome.
It isn’t just about hanging something heavy. It’s about securing it so that it stays fixed, even when kids bump the console or the weather heats up and cools down. Brick can crack. Mortar fails. Do-overs on these surfaces aren’t simple. A trained tech knows what to do if bricks are soft or irregular, and how to work around awkward placements like outlets, windows, or mantle spacing.
Plus, most people don’t own heavy-duty hammer drills or industrial sleeves for anchors. And even if you did, installing a mount the wrong way may void your TV’s warranty. Calling in experienced help means everything gets handled the first time, with less stress and zero guesswork.
A well-mounted TV can totally change the feel of your living room or home theater. If you’re working with brick, it’s easy to get stuck figuring out what to do. But once the right plan is in place and executed with care, you’ll have a rock-solid setup that looks clean, works well, and doesn’t shift around.
Getting it right means balancing tool use, wall condition, and the weight of your screen. It takes a little more planning than a drywall mount, but the payoff is worth it. Your entertainment area feels more open, everything’s out of reach of small kids or pets, and the display becomes a focal point, not an obstruction.
In busy areas like the Bay Area, where homes range from older bungalows to newly built modern spaces, brick features are common. By planning around your wall type and taking the right measures, you can have a secure mount that lasts without damaging your property. Once it’s up and done the right way, all that’s left is to grab the remote and enjoy your space.
When you’re ready to enhance your living space with a sturdy and reliable TV setup, consider professional TV installation in the Bay Area. Trust Bay Area Wall Mounts to handle the hard work, ensuring your TV is mounted safely and securely. Enjoy a beautifully mounted TV without the hassle!

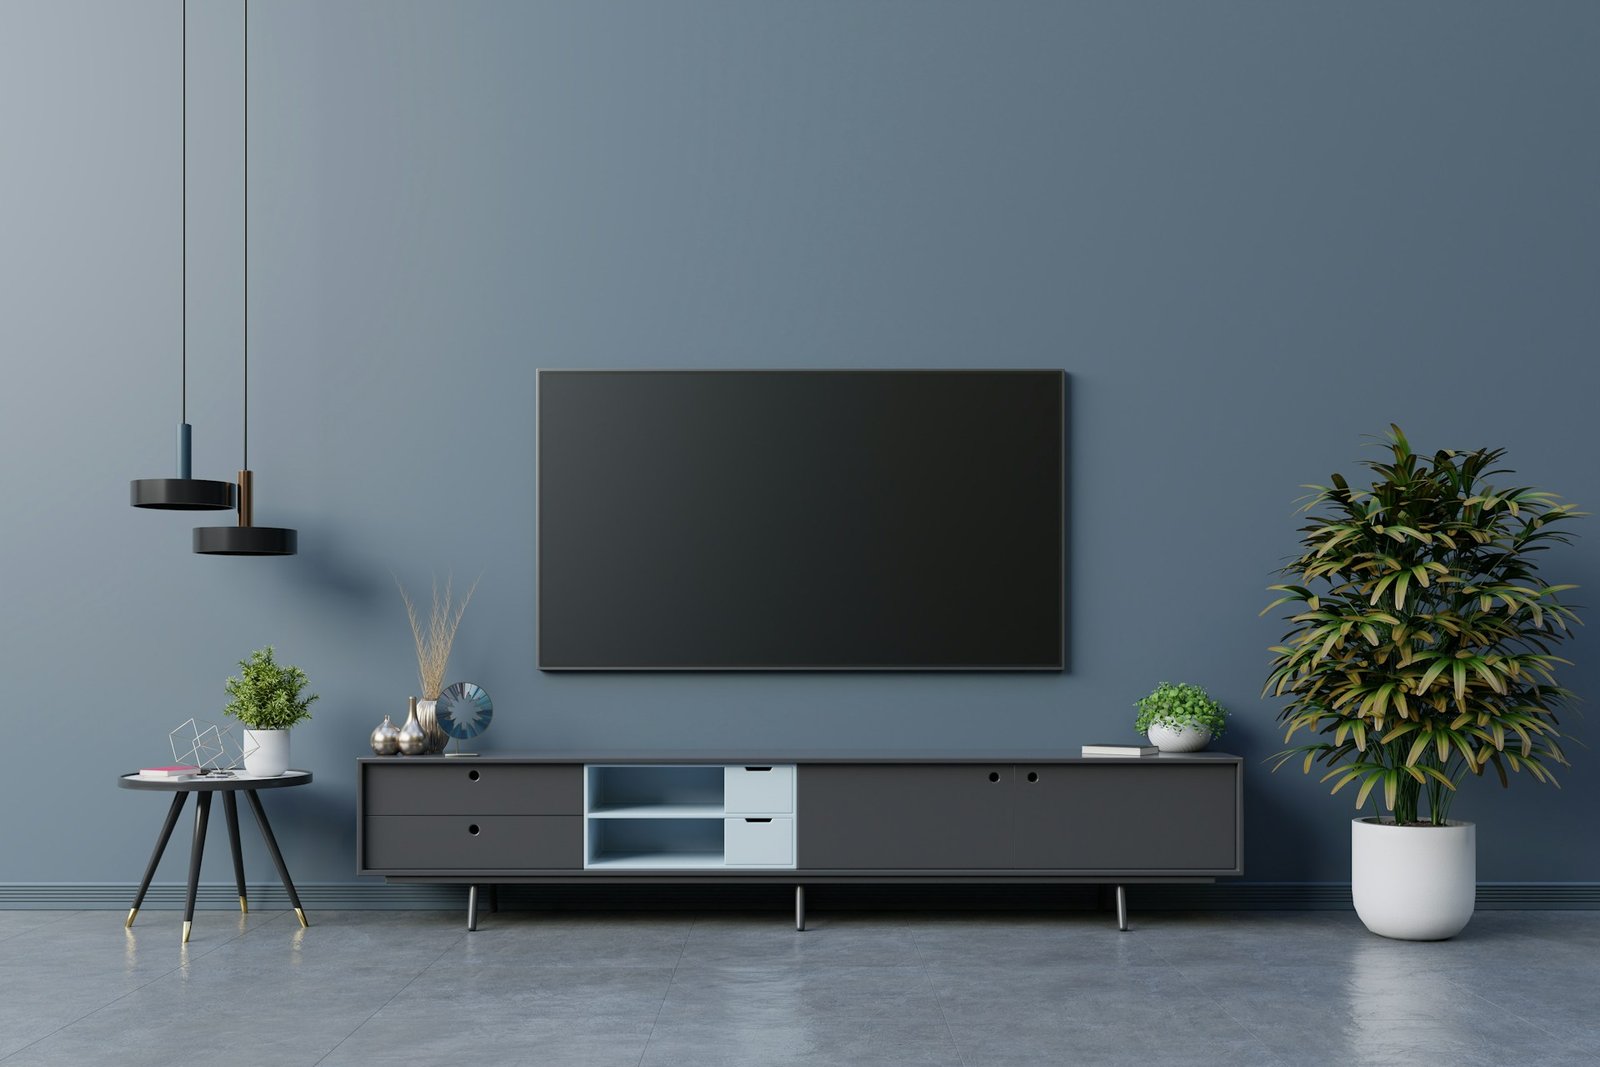
In the Bay Area, having the perfect TV setup can transform your home entertainment experience, making movie nights or gaming sessions much more enjoyable. One way to achieve this is by using the right TV wall mount. Wall mounts have become increasingly popular because they offer flexibility, save space, and provide a sleek look. Instead of having your TV take up valuable surface area, a well-chosen wall mount elevates your screen to an optimal viewing height while blending it seamlessly with your home’s design.
Choosing the correct wall mount isn’t just about aesthetics—it’s also about improving how you enjoy TV. The right mount can enhance your viewing angles, reduce glare, and eliminate the clutter caused by wires and stands. Whether you have a small apartment or a spacious living room, there’s a type of TV wall mount that can cater to your needs. Let’s explore the different types and see how each one could benefit you.
Fixed TV wall mounts are straightforward in their design, offering a no-nonsense approach to anchoring your TV securely against the wall. These mounts keep the television flat against the wall, providing a clean, minimalist look. They work especially well in situations where you primarily sit directly in front of the TV, as they do not allow for angle adjustments once the TV is mounted.
Benefits of using fixed mounts include their simplicity and low profile, making your TV almost flush with the wall, which is perfect for sleek, modern interiors. They’re generally easier to install and often more affordable compared to other types. However, keep in mind that once installed, adjustments are limited, meaning that if your seating arrangement changes, you might need to relocate the mount.
Fixed mounts are ideal for living rooms or bedrooms where the primary viewing position doesn’t vary. They ensure your TV stays in place, making them a great option for families with young children. However, if flexibility and angle adjustments are what you’re after, you might consider exploring other options.
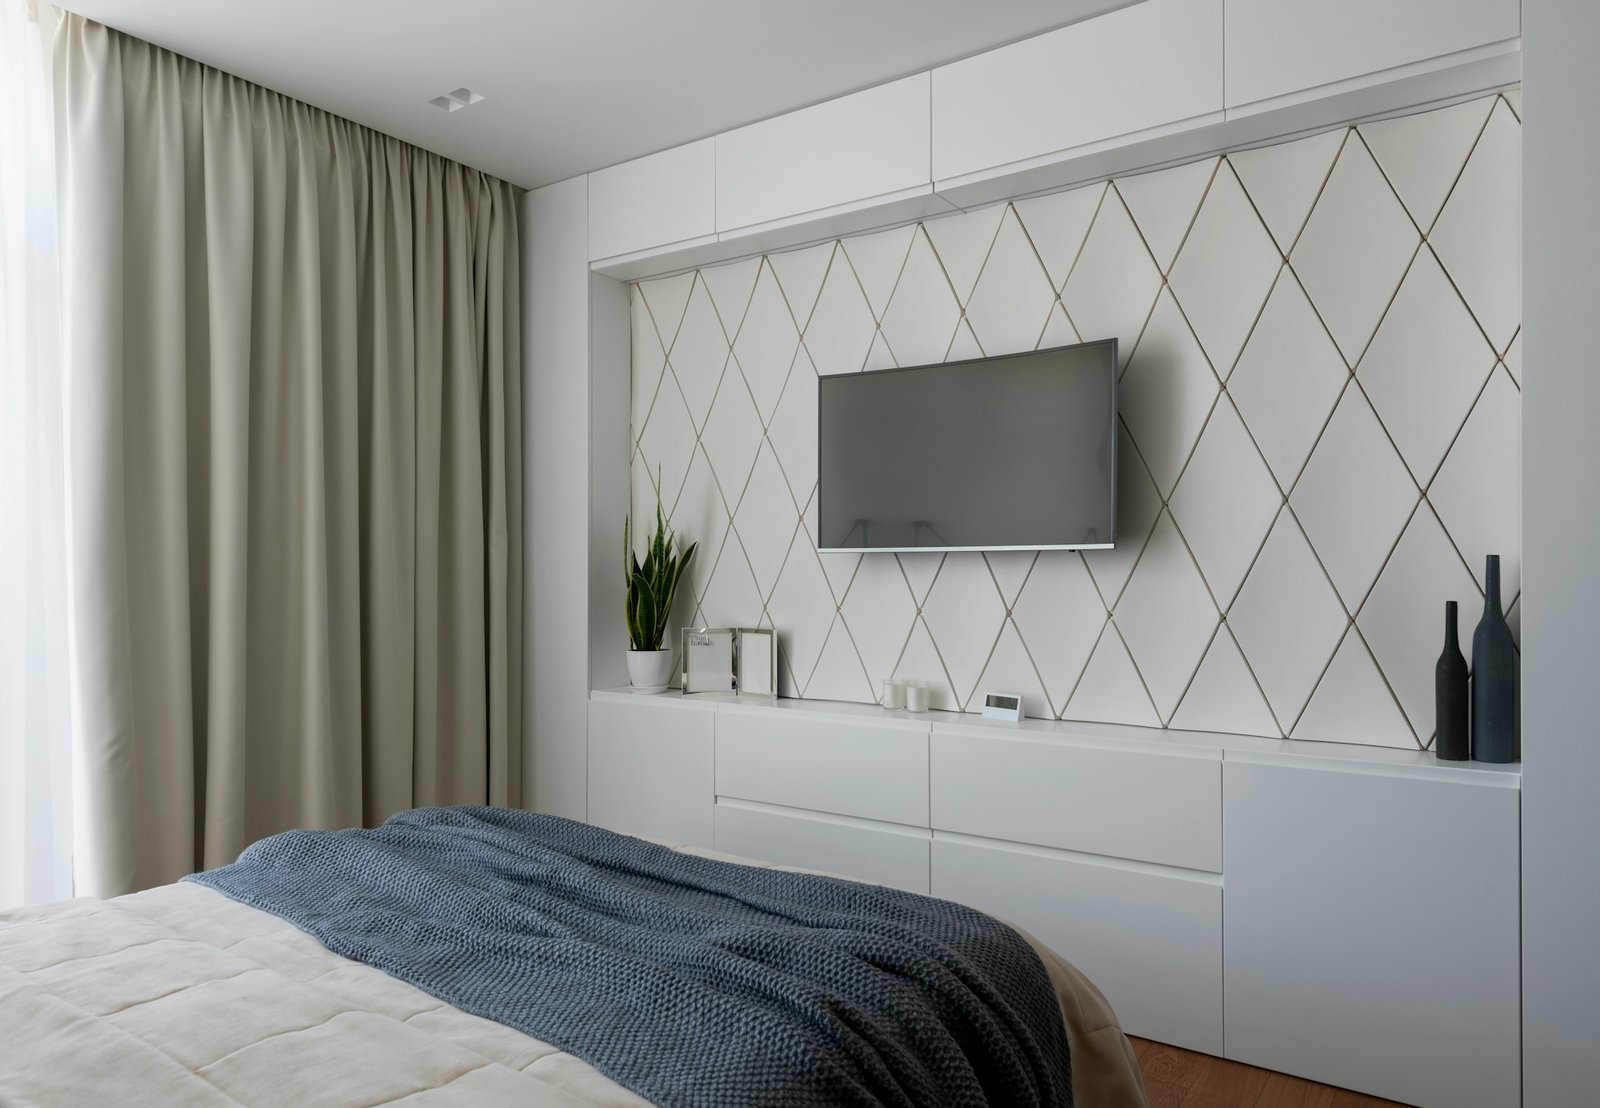
Tilt TV wall mounts offer a bit more flexibility than their fixed counterparts. These mounts allow you to adjust the angle of your TV vertically, which is especially handy if your TV is placed higher up on the wall. Tilting helps reduce glare from windows or lights and provides a more comfortable viewing experience when seated lower than the TV, such as on a couch.
The advantage of tilt mounts lies in their ability to adapt to different lighting conditions. For example, if sunlight pours through your windows during certain times of the day, a tilt mount will let you minimize reflections and glare, making your viewing clearer and more enjoyable.
Tilt mounts are most effective in rooms with multiple light sources or when the TV is mounted above eye level. A dining room with high-mounted screens or bedrooms with a wall-mounted TV above a fireplace are just the right places for tilting mounts. This adaptability promotes an immersive viewing experience, making these mounts a solid option for anyone looking to improve their TV setup without the need for complex adjustments.
Full-motion TV wall mounts are at the top of the versatility list, offering a comprehensive range of motion for your television. These mounts can extend, tilt, swivel, and perform almost any position your heart desires. This flexibility allows you to adjust the viewing angle according to the room’s layout or even accommodate gatherings where everyone isn’t seated straight-on.
The benefits of full-motion mounts are tremendous. You gain the ability to direct your TV toward different areas of the room, whether you’re watching from the sofa, kitchen, or dining table. This flexibility is perfect for open-concept spaces where you might move around frequently but still want to keep up with your favorite shows or movies. Another advantage is the easy repositioning, which makes connecting cables or cleaning behind the TV a breeze.
Full-motion mounts work best in larger rooms or spaces where viewers sit in various locations. For instance, if you have a living room that opens into the kitchen, being able to swivel the TV towards either space without moving the entire setup is incredibly convenient. It’s essential to consider your wall’s strength and the mount’s weight capacity, but when done right, these mounts elevate the viewing experience to its highest potential.
Ceiling TV mounts provide a unique solution, especially in rooms where wall space is limited or unconventional. These mounts suspend your television from the ceiling, which can be particularly beneficial in commercial spaces or homes with certain architectural designs. They’re a smart choice for areas with fluid traffic, like a large studio apartment or a fitness room.
The primary advantage of ceiling mounts is their ability to free up not just your walls, but your floors entirely. It removes the need for a bulky stand or cabinet, making them perfect for minimalist designs. Additionally, they offer adjustable viewing angles like tilt and swivel features.
When considering a ceiling mount, take note of factors like ceiling height and structure. It’s crucial to ensure the ceiling can support the equipment’s weight and that the viewing angle from your most common seating or standing areas is comfortable. Ceiling dips or slopes may require additional adjustments or specific mount types to guarantee stability and optimal viewing.
Deciding on the right TV wall mount involves considering your unique needs and space. Each type of mount offers distinct advantages, whether you’re seeking something fixed, tilting, full-motion, or overhead. What’s crucial is matching the mount to your lifestyle and room layout for maximum enjoyment.
Selecting the optimal mount largely depends on how you use your space. For a straightforward, no-fuss solution, a fixed mount might be the way to go. If you need some flexibility due to room lighting or high placement, tilt mounts can accommodate those needs. Full-motion mounts serve those who prioritize versatility, ensuring everyone has a great view regardless of their angle or location. Ceiling mounts, on the other hand, offer a creative way to make the most of your area, especially in rooms where wall space is at a premium.
No matter your choice, investing in a high-quality wall mount is a step toward an enhanced viewing experience. Remember, a well-installed mount not only improves aesthetics but function as well, turning your TV setup into an integral part of your home’s design.
Understanding the unique space of your home is key when choosing the right TV mount, and expert advice can make a world of difference. For guidance tailored to your setup, explore how Bay Area TV installation experts ensure a seamless and secure mounting process. Bay Area Wall Mounts delivers the professional support needed to enhance your viewing experience.
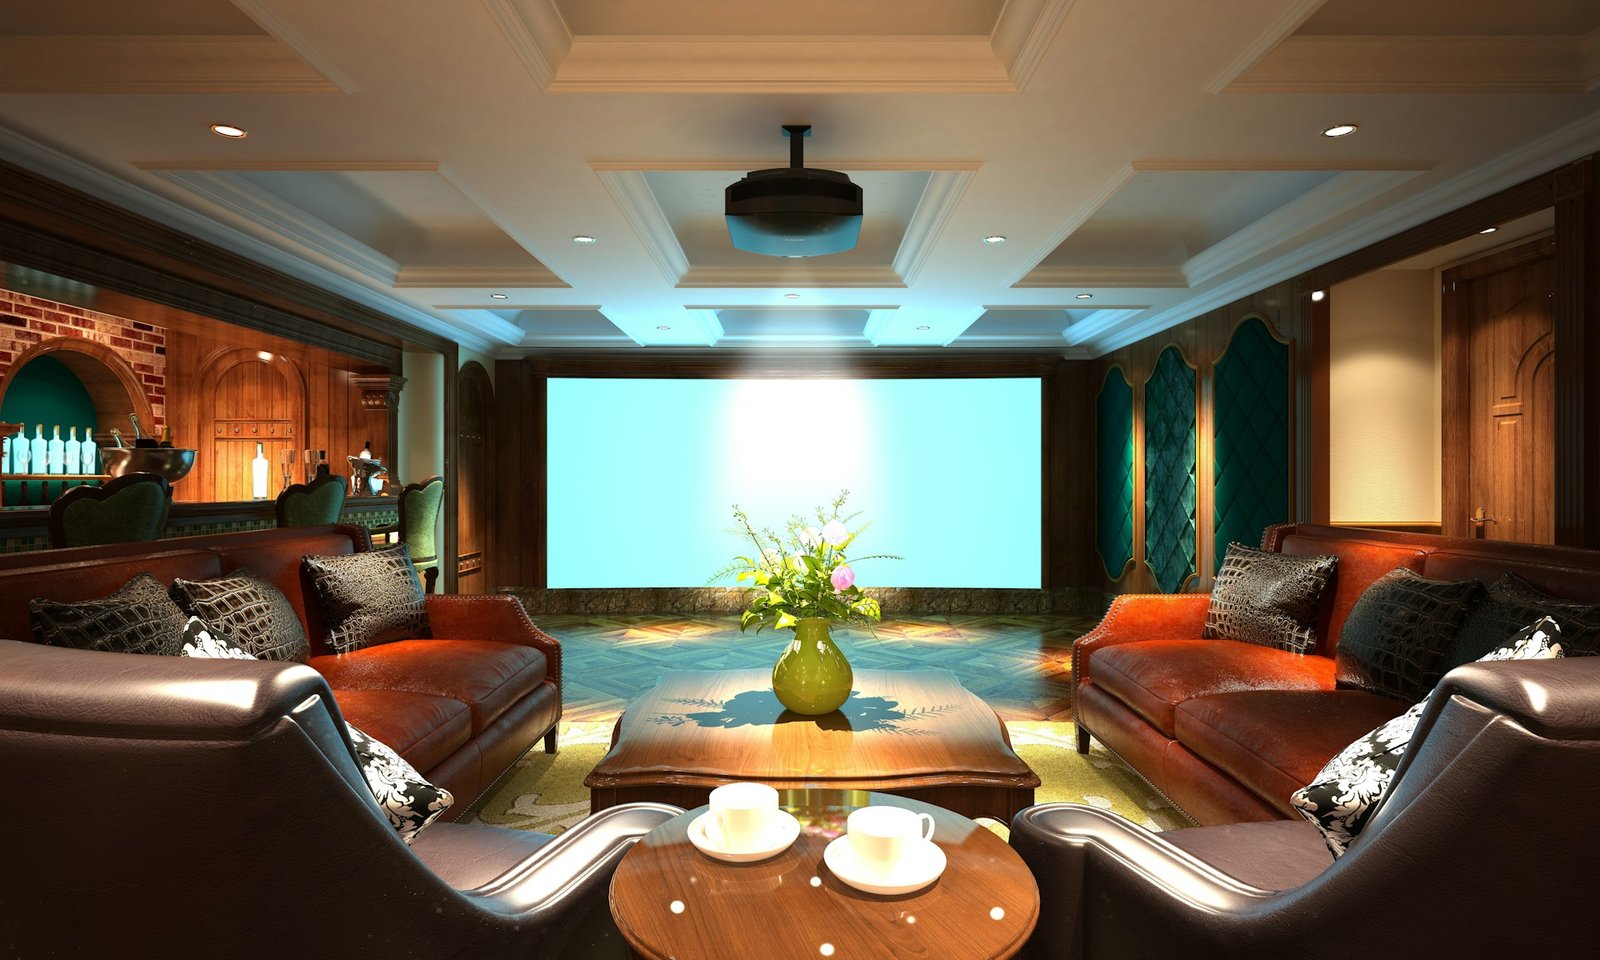
Have you ever dreamed of having the ultimate movie night without leaving your house? Creating your own home theater setup can transform your living space into a personal cinema, providing an immersive experience right at home. Imagine settling into a cozy chair, popcorn in hand, ready to watch the latest blockbuster on a big screen with surround sound enveloping you. With a bit of planning and the right equipment, this dream can become a reality.
Building a home theater doesn’t have to be overwhelming or expensive. It’s all about striking a balance between your entertainment needs and the space you have available. Whether you’re a tech enthusiast looking for state-of-the-art gadgets or just want a simple setup for casual viewing, there’s a solution tailored for you. Employing a few savvy tricks and smart tips, you can create a setup that offers both style and substance, ensuring every movie night is a memorable event.
To kickstart your home theater adventure, selecting the right gear is key. Each component of your setup should complement the others, creating a seamless viewing experience. It’s not just about picking the latest models, but about choosing equipment that fits your room and meets your viewing desires.
Consider all these components as building blocks of your home theater. Each choice impacts the final outcome, so take your time to research and select products that will give you the best viewing experience without breaking the bank. A well-chosen setup offers endless hours of enjoyment for you, your family, and friends.
When setting up your home theater, great sound and picture quality aren’t enough by themselves; positioning plays a vital role too. Strategically placing your TV is a big step toward immersion. Ideally, mount your TV on a wall where each viewer can see clearly, usually at eye level from your primary seating spot. For example, if your seating is a bit lower, adjust the TV slightly downward for a perfect view without straining your neck.
Seating arrangements are equally critical. Align seating to comfortably face the screen while giving yourself room to stretch and move around. A pro tip is to experiment with different distances and angles until you find the sweet spot that fills your field of vision while keeping you comfortable.
Here’s a helpful checklist to keep your setup tidy and visually pleasing:
For a home theater setup that truly stands out, consider elements that enhance both picture and sound. Lighting is crucial; bright lights can cause glare, which interferes with viewing quality. Adjustable lighting lets you dim the room to enhance movie moments without pitch-black darkness.
Comfort comes from more than just furniture, although plush seats are a definite game-changer for those movie marathons. Soundproofing your room can elevate your experience, allowing you to turn up the volume without disturbing neighbors. Simple measures like thick curtains, rugs, and even specialized panels can work wonders in retaining sound.
A well-thought-out setup completely transforms how you enjoy your entertainment. Whether watching a thrilling action movie or a quiet drama, these elements amplify the experience, making every moment more engaging and memorable.
While creating your dream home theater, there’s immense value in seeking professional assistance for the setup. Professionals bring expertise that ensures each component is properly installed, optimizing for both safety and performance.
With professionals at the helm, installation is much quicker, allowing you to enjoy your setup sooner without the hassle of endless adjustments. Reliability is another big plus; experts know how to secure mounts safely and configure systems for top audio and video quality, leaving no room for guesswork.
Hiring professionals can mean the difference between a good setup and a great one, providing you peace of mind knowing everything’s secure and adjusted to your space’s conditions.
Your vision of a home theater becomes a reality with the right planning and tools. Every detail, from the choice of equipment to professional installation, plays a role in creating a unique entertainment nook tailored to your tastes. By following these steps and tips, you’re on your way to transforming your living space into a theater-like experience, ready to entertain friends, family, and yourself for years to come.
Transform your space into the ultimate entertainment hub with a home theater setup in the Bay Area. For those aiming to have their TV expertly mounted for a crisp view and a clean look, Bay Area Wall Mounts is here to help. Let us assist you in creating a seamless, immersive experience that will impress your family and friends.
Taking care of your TV wall mount is like giving your home entertainment setup a comfy cushion to sit on. It’s not something we think about every day, but a little attention here and there can keep everything running smoothly for years to come. Having a well-maintained TV wall mount means you won’t have to worry about unexpected mishaps or annoying wobbling when you’re trying to enjoy your favorite shows or a family movie night.
Let’s face it, when it comes to home setups, a lot of us might overlook how the little details can impact the overall experience. A TV wall mount that hasn’t been cared for can slowly become a problem. Screws might get loose, dust can gather, and cables can become a mess. These issues might not seem like a big deal at first, but they can certainly affect how much you enjoy your entertainment space. Thankfully, keeping your TV wall mount in top shape doesn’t need to be tough or time-consuming.
Dust is the sneaky enemy of all electronics, and your TV wall mount is no exception. Over time, dust can accumulate in and around the mount, leading to possible issues down the line. One of the simplest ways to extend the life of your TV mount is to give it a good cleaning now and then.
Here are a few steps you can follow to keep things tidy:
Regular cleaning not only makes your setup look fresh and welcoming but also helps to maintain the functionality of your mount. A clean TV mount will ensure your TV remains stable, reducing the chance of damage and preserving your viewing pleasure.
With any wall-mount setup, the stability of your TV relies heavily on the tightness of the screws and bolts. Over time, these can work their way loose due to vibration or weight shifts. Checking and tightening them is a crucial step in maintaining your setup.
Here’s how you can do it:
Regular checks can prevent unexpected sagging or damage to the wall or TV. Plus, ensuring everything is secure offers peace of mind, knowing your investment is safely mounted and ready for all those binge-watching sessions.
Just like anything else that bears weight, TV wall mounts can show signs of wear over time. Checking for wear and tear is a smart way to ensure your setup remains reliable. When you’re inspecting your mount, pay close attention to the mounting bracket and any arm joints. If you spot any cracks or other signs of damage, it’s probably time to replace those parts.
Here are a few tips for a thorough check:
Being proactive about wear and tear can prevent unexpected sagging and keep everything in its rightful place. After all, nothing should interrupt your viewing, especially the safety and stability of your wall mount.
A neat setup extends beyond just the TV and mount. Cable management is another key aspect that doesn’t just keep your space looking tidy but also secures the longevity of your electronics. Nobody likes wrestling with a mess of tangled cables, and it’s easy to overlook until it becomes a nuisance.
To keep cables from becoming a tangled mess, consider these tips:
Caring for your cables is a simple yet effective way to make sure everything connected to your TV remains in top condition. Plus, it just makes your setup look clean and organized, which is never a bad thing.
While the tasks above can fit into any handy homeowner’s to-do list, there’s something to be said about bringing in a professional. Scheduling an annual inspection is a smart move to address any concealed issues and give your entire setup a thorough check-up. Professionals can spot what you might miss and provide peace of mind by ensuring everything is working as it should.
Annual inspections can catch:
Routine professional check-ups are a wise investment in maintaining the longevity of your TV wall mount and overall entertainment setup.
Maintaining your TV wall mount doesn’t need to feel like a chore. A little bit of regular care can prevent a host of problems, saving you time and potential costs in the long run. From regular cleaning and hardware checks to proper cable management, each step contributes to a stable and enjoyable viewing experience.
Integrate these simple practices into your routine, and you’ll find that they not only extend the life of your TV wall mount but also allow you to enjoy your entertainment without any interruptions. Ensuring everything is in top condition means more time catching up on your favorite series without any worries.
Ready to ensure the longevity of your TV wall mounting setup? Learn how affordable TV mounting in the Bay Area can support a safer, longer-lasting installation. Trust Bay Area Wall Mounts for expert service, whether you need routine maintenance or a professional inspection to keep your entertainment system performing its best.
Mounting a TV might seem like a straightforward task, but doing it correctly can make a big difference in your viewing experience. When a TV is mounted right, it turns any room into a cozy entertainment space where you can enjoy shows and movies without discomfort. On the other hand, a poorly mounted TV can lead to awkward viewing angles, reflection from windows or lights, and even safety hazards if the mount is not secure.
For anyone considering a DIY approach, it’s essential to understand the common pitfalls that could affect the enjoyment and safety of your home setup. These mistakes can range from selecting the wrong spot for the mount to ignoring vital details about the room’s layout. Let’s explore some common errors and how you can avoid them to ensure your TV is perfectly positioned and safely mounted.
Finding the perfect place for your TV is like picking the best seat in a movie theater. You need to make sure everyone’s comfortable and has a clear view. The height and angle are important factors, but there are other things to keep in mind too.
Here’s a simple checklist to guide you:
By carefully considering these points, you avoid the common mistake of assigning a random location for your TV. A little planning goes a long way in creating a comfortable and visually appealing setup. Choosing the right spot for your TV not only enhances the room’s appearance but also makes sure that your family and friends can enjoy a seamless viewing experience without any hurdles.
After finding the right spot, it’s important to get the measurements just right. A TV mounted too high or off-center can ruin the experience. Before drilling any holes, make sure to take precise measurements. Here’s why it’s important:
Focusing on these points will help you avoid common measuring errors that can spoil the look and feel of your TV setup. Taking a few extra minutes to double-check measurements ensures a polished and professional-looking result.
Understanding your wall structure is another crucial step in safely mounting your TV. Not all walls have the same load-bearing capacity. Here’s what you need to know:
Ignoring wall and stud considerations can lead to accidents and potential damage, so it’s worth getting this step right. Ensuring the TV is mounted securely doesn’t just guarantee safety; it also gives you peace of mind.
Once your TV is on the wall, managing the cables is the next step. Neatly organized cables not only look good but also prevent potential hazards. Here’s how you can manage your cables effectively:
Good cable management contributes to a tidy setup and prolongs the life of both wires and connected devices. A few extra steps in managing cables can elevate the look and function of your entire entertainment system.
Taking time to plan and execute these mounting steps can save you headaches and enhance your viewing pleasure. Whether it’s measuring accurately, considering your wall type, or organizing your cables, each step contributes to an outstanding setup.
Instead of letting these tasks feel overwhelming, think of them as an opportunity to ensure your living space remains inviting and clutter-free. A bit of preparation and attention to detail go a long way in making sure your TV setup serves not just as a source of entertainment but also as a well-integrated part of your home. Remember, for a seamless installation experience, consulting professionals ensures everything is done safely and stylishly.
Ready to take the stress out of setting up your TV? Discover how Bay Area Wall Mounts can simplify the process with professional TV wall mount installation in the Bay Area. Our experienced team ensures secure installations, leaving you with a perfectly positioned and clutter-free setup. Enjoy your entertainment space without the hassle—reach out to us today!
Turning a regular space into a captivating home theater is an exciting venture. One key ingredient to achieving this transformation is the right sound system. Surround sound brings an immersive audio experience into your living room, making movies and music more engaging. Instead of relying on your TV’s basic speakers, a superior audio setup wraps listeners in rich, three-dimensional sound, elevating everything from the roar of an epic battle to the subtle hum of a quiet evening’s dialogue.
Whether you’re a movie enthusiast or a casual viewer, the advantages of surround sound go beyond mere entertainment. With high-quality audio, your home becomes an inviting space for friends and family. Imagine gathering around for a big game or a cozy movie night, enjoying the same audiovisual thrills often reserved for a commercial theater. Offering more than just sound, surround sound creates moments to be enjoyed and remembered.
Surround sound transforms how we perceive audio, adding depth and dimension that standard speakers can’t match. But how exactly does it create such an encompassing experience? At its core, surround sound uses multiple speakers placed strategically around the room. These speakers work together to produce sounds from different directions, mimicking how our ears naturally hear noise. This setup creates an immersive sound field, enhancing both subtle background noises and intense action sequences.
There are a few types of surround sound systems, each offering unique features:
Choosing the right system depends on your space, personal taste, and budget. Are you looking to fill a smaller room or a spacious open area? A 5.1 system could be perfect for a cozy space, while a 7.1 setup might suit larger rooms better. Dolby Atmos, on the other hand, offers an advanced approach for those seeking a top-tier experience. Understanding the basics helps guide your decisions and tailors your choice to your living environment.
Living in the Bay Area, with its love for innovation and quality, means appreciating the finer aspects of home entertainment, such as surround sound. Adding this feature to your setup brings multiple benefits:
By investing in a proper surround sound installation, you’re not just enhancing viewing pleasure but also increasing your home’s desirability. As every sound effect and musical note becomes clearer, your home ceases to be an ordinary space and becomes a haven of entertainment delight.
Picking the perfect surround sound system isn’t just about grabbing what’s popular. It’s about creating a setup that fits your needs and space. Start by considering the size of the room. A larger room might demand a more powerful system, while a smaller space could benefit from a compact yet effective setup. You’ll also want to think about your budget. Many options provide outstanding quality without breaking the bank.
Personal preferences play a massive role, too. Do you want a system that’s simple and easy to install? Perhaps you’re more interested in features like wireless connectivity or compatibility with smart devices. Here are a few tips to guide you:
Taking time to assess these elements ensures that your new sound system meets expectations and enhances your entertainment experience effectively.
When it comes to setting up your dream surround sound system, one big question often arises: Should I install it myself or hire a professional? Both approaches have their merits, but professional installation offers some clear advantages.
With professional installation, you save time and potential frustration. Professionals ensure that every component is positioned correctly to provide the best sound possible. They can also handle tricky wiring tasks, ensuring neatness and avoiding unsightly cables that might clutter your room. Moreover, experts know how to fine-tune your system, calibrating sound levels to ensure optimal audio performance.
Here’s what to expect from a professional installation:
While DIY might seem appealing for the hands-on enthusiast, entrusting the job to someone experienced often results in fewer headaches and superior sound quality.
Wrapping your living space in high-quality surround sound transforms an ordinary room into an audio paradise. The thrilling sound precision and enhanced clarity will change how you experience movies, music, and even gaming. Picture yourself sitting back, surrounded by immersive sound that makes every whisper, splash, and explosion come alive with intensity and detail.
This upgrade isn’t just about entertainment, though. It turns your home into a memorable place for gatherings and special occasions, fostering memorable experiences with family and friends. By installing a top-notch surround sound system in your Bay Area home, you’re investing in long-lasting enjoyment and comfort.
If you’re contemplating this upgrade, now’s the time to plan how you want your sound to shine. With the right tools and professional support, you can create a home theater that stands out and provides endless thrills.
Ready to elevate your entertainment setup? Discover how Bay Area Wall Mounts can enhance your home with professional surround sound installation in the Bay Area. Our expert team ensures seamless integration, making every movie night an unforgettable experience. Reach out today and transform your living space into the ultimate audio haven.